
About Chef Rikku Ó’Donnchü
aka The Viking Chef
Rikku is no stranger to culinary awards achieving Michelin and AA recognition in the UK before coming to South Africa and now onto Lancaster PA
Born in Leicestershire England, I grew up in the small town of Chilwell in Nottinghamshire, there wasn’t exactly a huge selection of places to work while I studied science, music and psychology at a community college down the road from where I stayed with my mother and two sisters.
Being from all extremely humble family, I needed to get a job if I wanted to be getting things like driving lessons, new clothes, music equipment etc, and that led me, eventually, to a restaurant called Harts in Nottingham city.
The Executive chef was Michelin awarded Aaron Patterson, and head chef, now Michelin awarded Gareth Ward, and I began my introduction into high end, contemporary cuisine, foods, I didn’t even know existed and I was hooked, I’d found my calling…
I continued to study chemistry, that being the subject I gravitated towards and qualified in, but I stayed in the Michelin awarded kitchens of Europe, leaving Hambleton Hall to work for The Godfather of modern cookery, Marco Pierre White.
But it was Stages at Chez Dominique, The French Laundry and The Fat Duck ( 2 of the world’s most decorated and famous restaurants) that paved the way to me becoming the Chef I am today.
After my travels from Europe to New Zealand, Asia, the US and Scandinavia, I returned to the UK in 2012 and found Merchants, then began showcasing some of the science and creativity I’d learned on my culinary journey.
In 2016, Master Chef the Professionals aired featuring, lil’ ol’ me…
My food was described by Judge Greg Wallace as “challenging, dynamic, intricate and boarder-line genius”… My dishes secured me two of the best dishes of the competition and saw me through to the last 5 contestants, believe it or not, one of the hardest things I’ve ever done!
Greg recently said that I was four years too early as they are seeing a whole generation of chefs coming on the competition inspired by my love of science and the Avant-garde.
We achieved AA, Michelin and other coveted local accolades within one year, and not only featured in the very first Great British Cook Book, but landed on the cover.

In 2016, I made my move to Cape Town, South Africa.
I, like many other European chefs, fell in love with the city and wanted to open a world class dining experience on a world class wine farm….
So I did!
I spent a year developing the food, restaurant and kitchen concept and recruiting, training, researching and experimenting while consulting and moonlighting as a Chef presenter on various day time and morning T.V channels, featuring in local cooking magazines, cooking shows, brand association work and international pop ups with the National Chef of Scotland, Garry McLean and various celebrity chefs.
And then… Open GÅTE, on Quoin Rock wine estate, owned by Ukrainian business tycoons.
We were finally open and I was Executive Chef of what was described as the new jewel of the wine-lands and the country’s best restaurant within the first 3 months of opening, I changed the face of molecular and theatrical dining in South Africa, winning Global Best Chef, Global Best Restaurant, Best molecular, Best Avant-garde, Best Architecture and Best Location at The World Luxury Restaurant Awards Moscow Russia in June 2019.
However, because of certain restrictions and changes in circumstances within the wine farm it’s self, I left to open my own restaurant EXHIBIT A with my Head Chef Warwick King, one of South Africa’s best modern fine dining chefs.
I pumped everything I had into EXHIBIT A, we became an overnight sensation and featured in the 2019 South Africa’s best restaurants in The Wall Street Journal.
March 2020 brought news of a bleak frontier happening within the restaurant scene in South Africa and as a result, we were one of the casualties that eventually shut down my restaurant EXHIBIT A.
But everything happens for a reason…
Fate, it would seem, put me in the path of Lancaster restaurateurs and business persons, Tom and Donna Ponessa.
With our visions in full harmony, I’d found ‘a little love’ in Lancaster PA, AAA four diamond, 2 glass wine Spectator awarded AMORETTE on N Prince St.
The vision…to give diners a world class, Michelin Star, James Beard, Worlds 50 Best restaurant experience in the city of the big cities.
And that’s just what we’re about to do.
#capellilavita #savourlavita #savourwithrikku
Rikku Ó’Donnchü
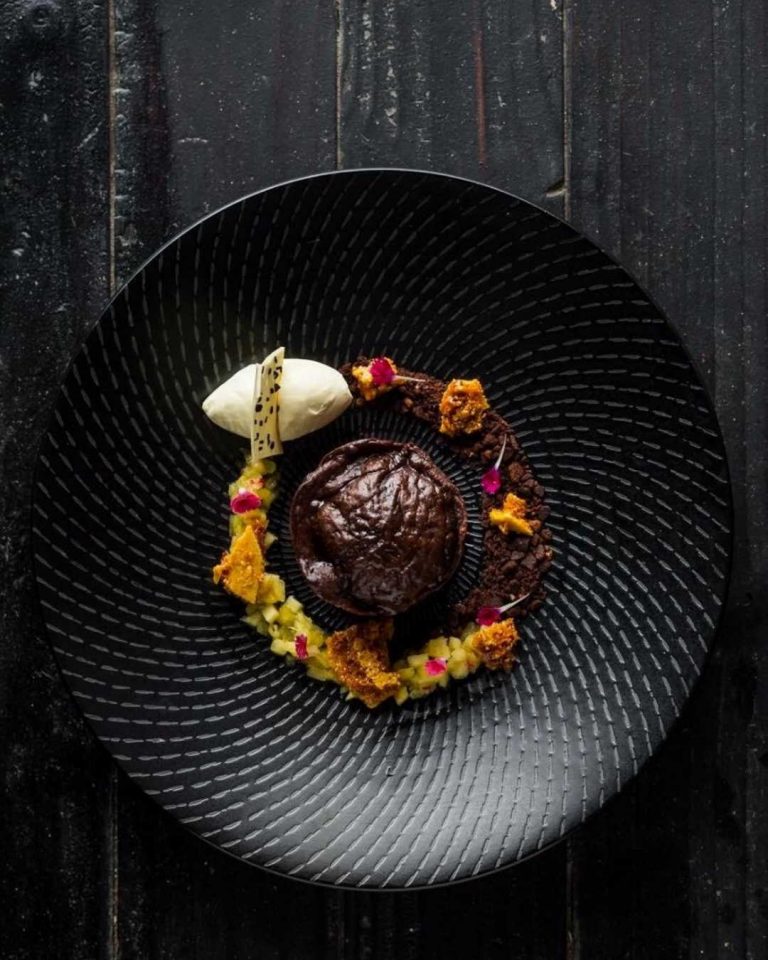
Mint Chocolate fondant, pineapple, chili & mint salsa, caramelized pineapple purée , vanilla mascarpone sorbet
The Recipe
What you’ll need…
- moulds
- mixer
- ice-cream churner
- spatula
- scales
- liquidizer
Fondant:
240g organic plain wheat flour
40g organic fair trade cocoa powder
300g organic unsalted butter
300g 82% Valrhona chocolate
6 large free range eggs
6 free range egg yolks
240g golden syrup
Seeds of 1 vanilla pod
1 teaspoon pepper mint essence
Melt chocolate, syrup, essence and butter together in a glass/metal bowl over boiling water.
Whisk eggs, vanilla seeds and egg yolks until thick, white and fluffy.
Poor in chocolate, mix until smooth and incorporated.
Mix flour and cocoa powder, then sieve over mix and fold softly through until shiny.
Poor batter into piping bag and pipe into moulds (coat moulds in butter and cocoa powder, tap out ALL loose cocoa)
Bake for 6-7 minutes 190c
Stand for 1 minuet before turning out of the mould.
#capellilavita #savourlavita #savourwithrikku
Pineapple salsa:
1 pineapple
4 sprigs of mint
1 red chili
1 lime (juiced and zested)
1 tablespoon of caster sugar
Peel and dice a pineapple, cover in sugar and lime.
Finley chop mint and the red chili and toss all ingredients together.
Coat the apple in syrup and toss in the chopped mint.
Caramelized pinaeapple purée:
5 tablespoons of honey
150g brown sugar
1 peeled and diced pineapple
120g salted butter
Heat sugar to a caramel and add honey.
Boil for 3 minutes and add pineapple.
Cool for 10 minutes at a simmer.
Remove from heat and melt in butter.
Blend into a smooth purée and pass through a sieve.
vanilla mascarpone sorbet:
700g mascarpone cheese
Seeds of 2 vanilla pods
525ml water
500g caster sugar
Juice and zest of 2 lemons
Boil water and sugar together with lemon juice and zest, and cool.
Liquidize all ingredients, churn and freeze.
Best served with, Vin de Constance naturally.

Rikku Ó’Donnchü
Salted caramel cheesecake
The Recipe
FOR THE SALTED CARAMEL
- 2 Tins treat caramel
- 1 large pinch salt
FOR THE CHEESECAKE
- 250g crushed caramel tennis biscuits
- 100g unsalted butter, melted
- 1/2 teaspoon ground nutmeg
- 1/2 teaspoon ground ginger
- 500g cream cheese, room temperature
- 150g caster sugar
- 2 teaspoons teaspoon vanilla extract
- 3 large eggs, room temperature
- 2 bananas
- 200ml sour cream
#capellilavita #savourlavita #savourwithrikku
Method:
FOR THE CHEESECAKE
- Preheat the oven to 160C
- Grease and line the base and sides of an 8 inch round spring form tin. Use a food processor or blender to process the biscuits to fine crumbs. Add the nutmeg and ginger and process to combine. Add the melted butter and blitz one more time to combine completely. Tip the mixture into your prepared tin and press down all over the base and up the sides about 2 inches (notes)
- Chill base for 20 minutes and slice bananas and layer covering the biscuit base.
- Using a stand mixer with the paddle attachment or handheld beater, beat the cream cheese, 1 Tin of treat and sugar until smooth and creamy. Scrape down the sides of the bowl as required.
- Add the eggs one at a time, then the vanilla beating until each is well incorporated. Beat for a further 2 minutes on a low to medium setting. Add the sour cream and beat until just combined.
- Pour the filling into the biscuit and banana base and smooth over the top as much as possible.
- Place the tin onto the middle shelf of the oven. Bake for around 55-65 minutes or until the centre is almost set. There should be a very slight wobble in the centre. Leave it to cool in the oven with the oven off and the door ajar for 1/2 an hour then take it out and let cool at room temperature for at least 45 minutes. Finally, transfer to the fridge to cool completely for a minimum of 4 hours.
- Top with caramel treat, then use rock salt to slightly salt the top.
Serve with a strawberry and mint salad…
A Rosé matches this nicely, acting as a palate cleanser adding some floral notes for contrast, alternatively, if you want to match the mouth feel and flavour, an un-oaked Chardonnay with pop corn notes will match perfectly!
Rikku Ó’Donnchü
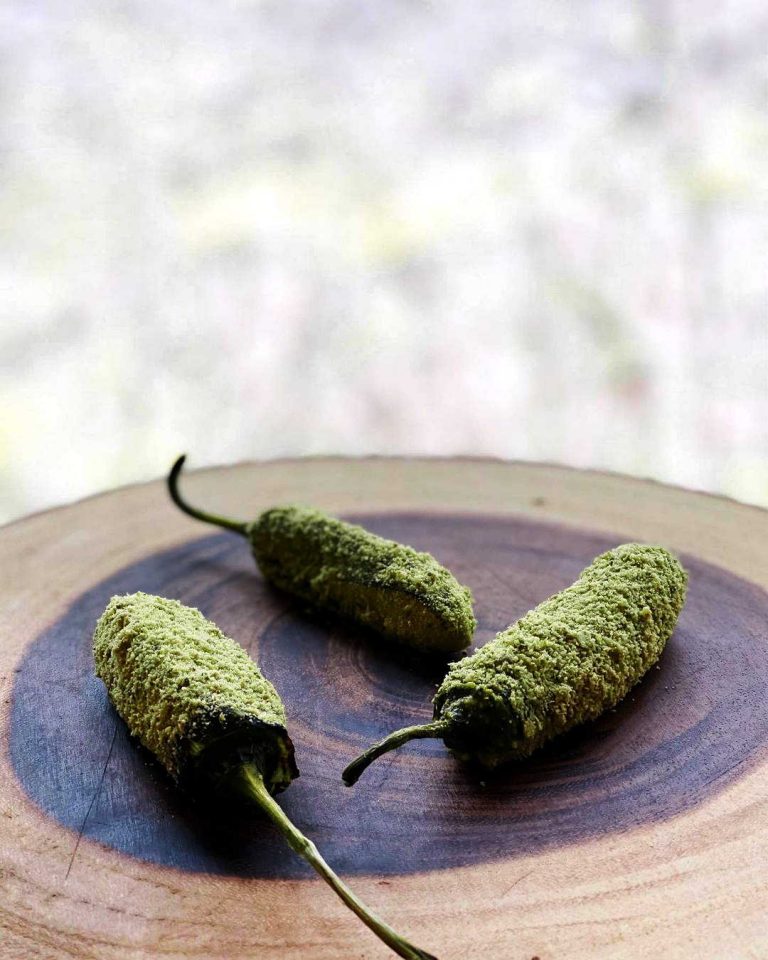
Jalapeño and blue cheese poppers
The Recipe
What you’re gonna need ..
- Cling wrap
- Spoons
- Sharp small knife
- Cutting board
- Large sauce pan of hot water
- Blender
- Oven
- Piping bags
- Blow torch or gas top stove/grill
Ingredients:
- 12 fresh jalapeños
- 200g of a decent blue cheese
- 2 egg whites
- 150ml cream
- 1 small jar of pitted green olives (pre brined)
- Juice and zest of 3 limes
- 300g caster sugar
- Salt
#capellilavita #savourlavita #savourwithrikku
Method:
- Set your oven on 70 degrees centigrade and place the first 5 jalapeños in the oven with half the blue cheese, and the green olives, over night or for at least 14 hours.
- The following day, blend into a powder with the citric acid until a fine, light green powder has formed
- Sieve out any remaining lumps and store in an airtight, dry container until needed.
- Heat sugar and lime juice to boiling point, add the 2 chopped jalapeños and cook until soft.
- Blend into a smooth jam and allow to cool. Transfer to a small jar until ready for use.
- Flame grill or torch the rest of the jalapeños until the skin blisters black all over.
- Place in a bowl and cover with cling wrap, leave for 30 minutes to cool, then remove from brown and peel using a towel to rub off the burnt skin then open the jalapeño by making one cut length ways down the flattest side of the pepper.
- Scrape out all the seeds ready to fill.
- Whip egg whites into stiff peaks and sit aside.
- Heat cream and melt in the blue cheese, then allow to cool to room temperature.
- Fold the whites into the cheese mix and transfer to a piping bag.
- Pipe the blue cheese mousse into the grilled jalapeños and roll in cling wrap, roll nice and tight, then tie each end tight.
- Place in a pan of simmering water for 15 minutes to set the mousse.
- Allow to cool and cut open the cling wrap, brush off the excess mousse so the outside is clean.
- Pat the jalapeños dry with a towel and brush on the jalapeño jam.
- Roll in the jalapeños in the powder and serve!
Unbelievable with wooded Chardonnay, the smoky notes and creamy textures blend with each other so harmoniously, it’s definitely one of my favorite pairings of all time for a simple (ish ;)) snack!

Rikku Ó’Donnchü
Celeriac Rose
The Recipe
What you’re gonna need ..
- Large sauce pan
- Mandolin
- Liquidiser
- Fine Sieve
- Table spoon
- Wooden spoon
- Fine grater
- Jug
- Scales
- Small baking tray
- Peeler
- Medium sharp knife
Ingredients:
- 2 x medium sized Celeriacs (1peeled and diced)
- 1kg table salt mixed with 300ml of water
- 300 ml double cream
- 1 white onion finely diced
- Zest & juice of 1 lemon
- 10ml sesame oil
- 5g toasted black & white sesame
#capellilavita #savourlavita #savourwithrikku
Method:
Pre-heat oven to 160c
- Pack salt slurry around the whole celeriac and bake for 50 minutes
- Crack the salt and allow to cool
- Peel, then using a mandolin, slice into .4mm thick discs
- Arrange in a flower like shape in the middle of a white bowl by layering from the middle outwards and season with lemon juice
- Boil chopped celeriac, lemon zest and onion in the cream for 3-5 minutes, then slow simmer for a further 15 minutes until the celeriac is super soft.
- Blend the mixture with a splash of the lemon, a good pinch of baked celeriac salt from the salt bake and the sesame oil until smooth then pass through a fine sieve
- Poor around the celeriac flower and sprinkle with the toasted sesame
Amazing with a Hamilton Russel 2018 Chardonnay

Rikku Ó’Donnchü
Caviar Macaron
The Recipe
Ingredients:
- 75g ground almond
- 75 g icing sugar
- 28 g+28 g egg whites
- 19 g water
- 75 g sugar
- 5g squid ink paste
- 10g puréed lumpfish caviar
A series on taking the standard Macaron to new taste sensations.
#capellilavita #savourlavita #savourwithrikku
Method:
- Weigh the ground almond together with the icing sugar. You can weigh it directly in the food processor if you wish.
- Blend both ingredients together. Our aim is to achieve a very fine texture of the almond together with the icing sugar.
WARNING: When you process almonds, make them with intermittent touches, not too long. Otherwise the blades will be heated with friction and the almond will release oils that we are NOT interested in this process.
- Sift the mixture. It is not necessary to do it two or three times, with one we will be perfect.
- Weigh the egg whites and separate them into two equal parts of 28 g each.
- Mix one of them with the food colouring and the extract. The other we will pour it in a bowl to whip it and to elaborate an Italian meringue.
Make Italian meringue for macarons.
- In a saucepan pour the water together with the sugar and cook over medium heat without stirring. Leave until it reaches 118º C, for it we will help ourselves of a digital thermometer.
- While it reaches the wished temperature we begin to whip the egg whites (that we had reserved in a bowl previously) until we get soft peaks.
- Start with the lowest speed and gradually increase.
- We will never reach the maximum speed of the manual mixer, otherwise we will dry the egg whites. It is preferable to whip gradually rather than suddenly and with a high speed.
- Once the syrup reaches 118ºC, remove it from the heat and begin to incorporate it little by little and in a fine and continuous thread to the semi-mounted whites. While we do this, we will beat at the same time with the electric whisk or in the Kitchen Aid.
- Whip until obtaining a firm meringue, but without forming hard peaks. We don’t want a firm and dry meringue, but one that falls on itself.
- A small tip to know the state of meringue is the use of a thermometer.
When we are whipping the meringue and we consider that it is ready, put the thermometer in it. If it marks between 50º-47ºC, it will be ready.
WARNING: This information is for guidance only. If we take a long time to whip the egg whites and stop very often to check the temperature, it will fall before reaching the desired point and, therefore, this guideline is not worth us as a step to follow.
- Add the un-whipped egg whites with squid ink and caviar purée to the almond mixture. Do not mix or stir, and add the meringue as well.
Make macaronage.
- Make macaronage with gentle, enveloping movements. We have to integrate some ingredients with others without beating them, as we do not want the meringue to lose its firmness.
- Place silicone spatula underneath and towards the centre, we go up incorporating it into the centre again. We will make a few movements but not many! We must observe that texture takes our mixture once the ingredients are integrated.
- When we find ourselves doing the macaronage and want to know if our batter is ready, we will deep and remove the peak of the silicone spatula in the batter with a quick movement. If the peak falls and is incorporated practically whole, it should not be totally integrated, then we will have it ready.
- When you do this test you can hit the bowl against the table a couple of times after removing the spatula, so we will imitate the effect of gravity that will appear after piping the macaron in the tray.
Pipe.
- Once we have the batter ready, it is time to place our macarons on the baking tray (pipe). At the time of baking there are several options to place the macaron: we can do it on baking paper, Teflon or silpat.
- We can use a smooth tip or make a cut at the end of the piping bag. When you cut the piping bag to place the nozzle, make sure that the cut you make on the sleeve is far from the exit of the tip, otherwise you can deform the macarons when piping.
- To pipe the macarons we can make drawings on the baking paper or use templates. Remember that I attach 4 templates with different sizes: very small, small, medium and large. In this way it will be much easier to control its size without having to make circles in the paper oven.
- Place the templates under the baking paper and pipe.
- With the vertical piping bag, gently press and release before reaching the limit of the circle. They tend to grow a few millimeters after the pipingbecause they expand slightly, so it is advisable not to reach the edge.
- Once we have all our macarons on the tray, tap a couple of times against a work surface to help settle them and expel possible air bubbles.
Drying process or croûtage.
- The drying time will be relative and will depend on various conditions, the place where we live, temperature, humidity … It can range from 20-45 minutes as a normal average or even go a couple of hours in cold times.
- In order to know when they are dry it will be enough to pass the fingertips over one of them, the batter will not stick to these. In addition we will notice that the surface will have taken a satin aspect.
- In order not to spoil our macarons the best thing will be to make a macaron in a side as a sample and it will serve us to know how the time of drying evolves.
Bake.
- Preheat the oven to 310ºF/155ºC. Must preheat a minimum of 10 minutes before baking, it must have the correct temperature when we place the macarons. It will be very useful to help us with an oven thermometer to know and know the interior temperature.
- Place the macarons inside and lower the temperature to 300ºF/150ºC.
- Halfway through baking (depending on the size chosen, see NOTES) open the door for a few seconds to encourage the steam exit, close the door and finish cooking. In some cases we will have to gradually lower the heat and in others we can bake at 290ºF/145 ºC throughout the time without changing anything.
- Remove from the oven and transfer to a smooth surface or another cold oven tray (room temperature) on the parchment, teflon… and let it cool completely. Never place them on a rack. The reason is that they are still tender and the base could take the form of it.
- Once they have cooled, we will be able to separate them from the paper without problems. They will actually peel off on their own.
- Store in an airtight container until the next day. You can also fill them the same day if you wish, but remember that they must mature 24 hours in the fridge before consuming them.
Serve topped with caviar and potato purée in the middle for a classic Russian combination!
This needs a great ice cold fresh vodka to do with, I recommend Finlandia!

Rikku Ó’Donnchü
The Recipe
- 4 tablespoons olive oil
- 1 cup brinoie shallot (super fine or grated)
- 1 clove garlic, minced
- 2 cups Arborio rice
- 1 cup white wine
- 3 cups mushroom/chicken stock
- 1/2 cup grated Parmesan
- 4 tablespoons butter
- 5g white truffles
- 2 tablespoons of white truffle oil
- 3 tablespoons of fresh lemon juice
- Salt to taste
Method:
- In a heavy bottomed sauce pan, heat olive oil to medium and slowly cook through the shallot and garlic until translucent.
- Add the rice and toast slowly for 3 minutes.
- Add the white wine and reduce until disappeared.
- Add the stock and cook on low with the lid on until the rice is cooked and it’s still slightly runny.
- Remove from heat, add Parmesan and butter and fold in gently.
- Add lemon juice and season if needed
- Top with fresh shaven truffle and the truffle oil
This spectacular treat goes best with…
IDIOM CAPE BLEND 2015
NEW VINTAGE TO BE RELEASED IN 2021
A velvety opulent wine made with the Cape’s own grape Pinotage blended with noble varieties. Rich and intriguing aromas and flavours with exploding layers of red fruits with notes of hazelnut, dark chocolate and oatmeal. Soft tannins, dark red fruit and a long finish are hallmarks of this wine.
The chocolate and hazelnut compliment the truffle so so well, it literally becomes an extension of the dish it’s self.
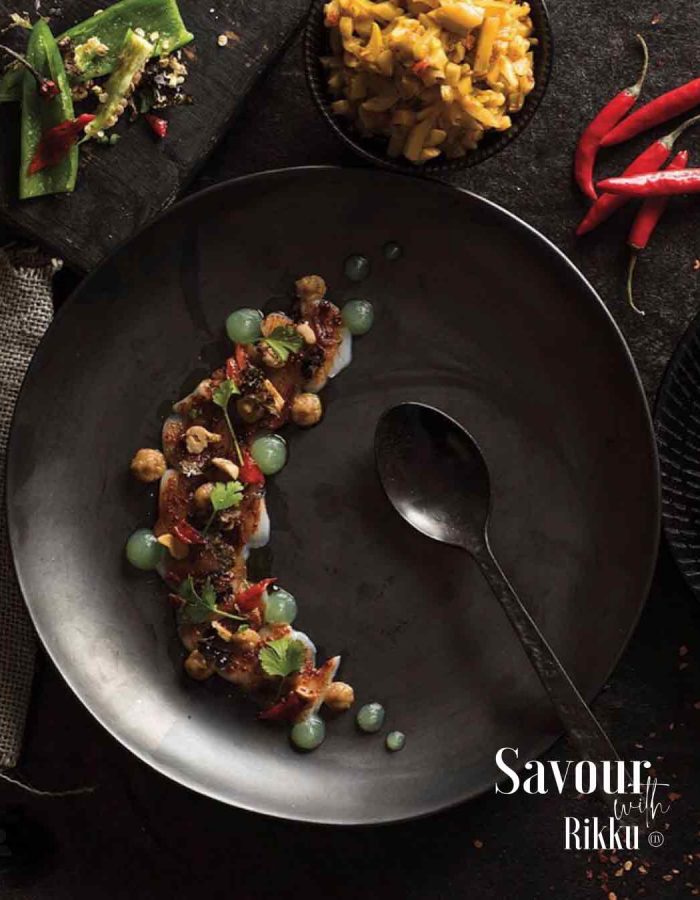
Scallop sashimi, tandoori dressing
Scallop sashimi, tandoori dressing, roasted hazelnuts, torched chili, cucumber gel, coriander
This dish will impress even the most discerning critics! Fresh, elegant, spicy…
It’s a trip to India!
#capellilavita #savourlavita #savourwithrikku
Rikku Ó’Donnchü
The Recipe
Ingredients
- 2 scallops per portion cleaned and cut into 3 medallions
- 50g of hazelnuts (roasted in olive oil for 7 minutes at 180c)
- Salt
- 1 tablespoon of tandoori paste
- Juice and zest of 2 limes
- Tablespoon of picked coriander
- 2 Red chilies blow torched until black then peeled
- 4 tablespoons of coconut oil
- 1 tablespoon of soy sauce
- Juice of 1 cucumber
- 10g Agar Agar
- 1 teaspoon of sugar
- 1 tablespoon of white vinegar
Arrange the slices of scallop, overlapping each other across a dipped plate.
To make the cucumber gel, blend a pinch of salt, sugar and the agar into the cucumber juice, transfer to a sauce pan, bring to boil and cook for 1 minute.
Poor mixture into a container and set in refrigerator for 10 minutes.
Remove and blend in high power liquidiser then pass through a fine sieve.
For best results, place in a piping bag then put in the fridge until ready to use.
For the tandoori dressing:
Blend tandoori paste, lime zest/juice, soy sauce and coconut oil into an emulsion.
Spoon over the scallops and leave to ‘cook’ for 10 minutes.
Sprinkle the scallops with hazelnut, the torched chili, picked coriander and finally pipe on the gel up and down the plate….
Suggested wine paring:
Goes best with a Cavalli Cappriole Blanc de Blancs 2015
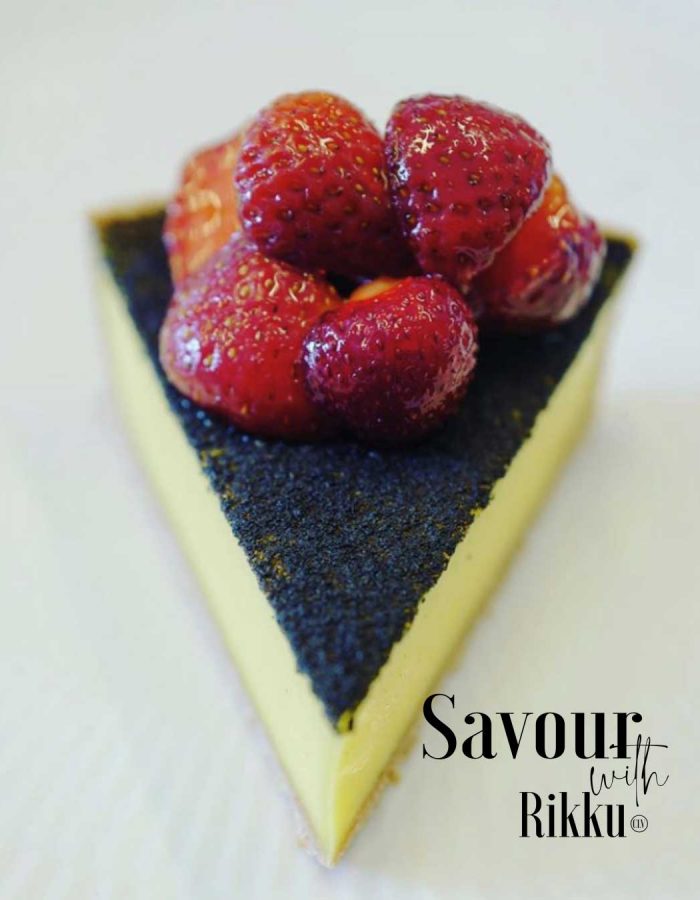
LIME & BLACK SESAME CUSTARD TART
This Lime and sesame custard tart recipe has near legendary status…
It’s my Nan’s recipe, and I guarantee, it beats any Michelin Star restaurant egg custard, hands down.
You’ll need…
Equipment
- Baking beads or rice for blind baking
- 18cmTart tin with removable base
- Sauce pan
- Cling film
- Grease proof paper
- Whisk
- Sieve
- Spoons
#capellilavita #savourlavita #savourwithrikku
Rikku Ó’Donnchü
The Recipe
Ingredients
TART PASTRY
- 225g of flour
- 1 lime
- Teaspoon of powered ginger
- 150g of butter
- 75g of caster sugar
- 1 egg
- 1 egg yolk
- 1 pinch of salt
CUSTARD FILLING
- 9 egg yolks
- 75g of caster sugar
- 350ml of whipping cream
- 150ml of lime juice
- 20g toasted black sesame
Method:
Start; your custard tart recipe by preheating your oven to 170°C
For the pastry, rub together the flour, salt, lemon zest, powdered ginger and butter until the mixture resembles breadcrumbs then add the sugar to the mixture. Then beat together the egg yolk and whole egg and slowly add these to the mixture. Mix until the pastry forms a ball. Wrap tightly in cling film and refrigerate for two hours.
Line your tart tin with greaseproof paper and place on a baking sheet
Roll out the pastry on a lightly floured surface to 2mm in thickness. Carefully arrange the rolled pastry into the tray and use any excess pastry to push into the corners to ensure the pastry is flush with the tray. Line the inside of the pastry with thick catering grade cling film, ensuring to use enough to go over the outside of the tart shell.
Use small baking beans or better yet rice to fill the lined tart shell. Bake blind for about 10 minutes or until the pastry is starting to turn golden brown. Remove the beans or rice, and allow to cool. While cooling, turn the oven down to 130°Cso you can cook your custard tart
For the filling, bring the cream to the boil. Whisk the yolks, lime juice and sugar together then add the cream mixing constantly until mixed well. Pass the mixture through a fine sieve into a jug.
Place the pastry case in the oven then pour the custard mix right to the brim. Spread the black sesame liberally over the top then bake for 35-40 minutes or until the custard appears set but not too firm.
Remove from the oven and allow to cool to room temperature before removing from the tin.
Serve with Saki marinated strawberries!
Suggested wine paring:
This goes SO well with strawberry sorbet and a good Le Lude sparkling Rosé!
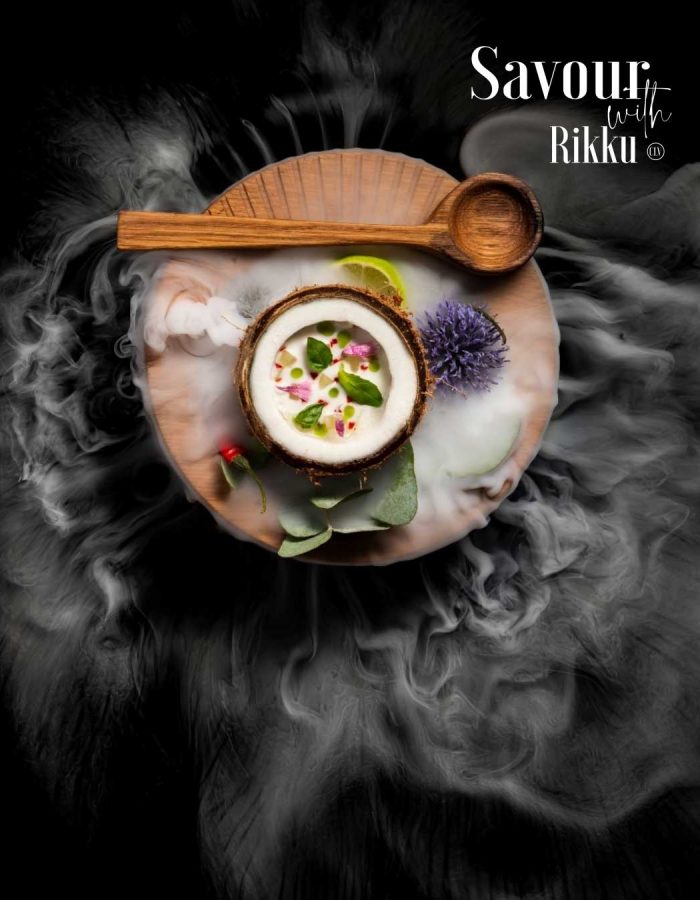
Rikku Ó’Donnchü
The Recipe
- 500g yellow tail fillet
- 1 can coconut cream
- 2 Limes
- 12g coriander
- 2 table spoons soy
- 1 spring onion
- 1 red chili
- 5cm of cucumber
- 2 pieces of pickled ginger
- 4 teaspoon of salmon roe
1)Remove any bones left in the fish and cut into sashimi size pieces, grate the zest of a lime on top of the fish and cover with the soy sauce. Leave to stand on a fridge for 15 minutes.
2)Use half the tin of coconut cream and add the juice of both limes.
3)Remove the skin and seeds from the cucumber and dice into half cm cubes.
4) Finley chop chili, coriander and spring onion.
5) Build it! Remove fish from refrigerator and place in serving bowl. Top with the coconut mix and sprinkle on all remaining ingredients evenly. Allow it to come to room temperature and serve!
This recipe is a great sharing starter or great as part of a tapas style menu and SO quick and easy to make. It’s healthy and it’s fresh!
Suggest wine paring: Hazendal’s Chardonnay
For less spicy dishes like coconut-milk mussels, ceviche including this dish, I’ll go for rich Chardonnays that offer similar creamy texture, the Hazendal is a particular favorite of mine because of its delicious complexity and versatility